Ideas from Ed: Fancy shmancy registers (Vol. 8, issue 9)
- edwardpetrus

- Sep 30, 2025
- 3 min read
I think this is the first time in my life that I’ve ever written the pseudo-word “shmancy” although I’ve used it a few times in speech! In any case, although the registers in this month’s column may be fancy, the article will be rather basic.
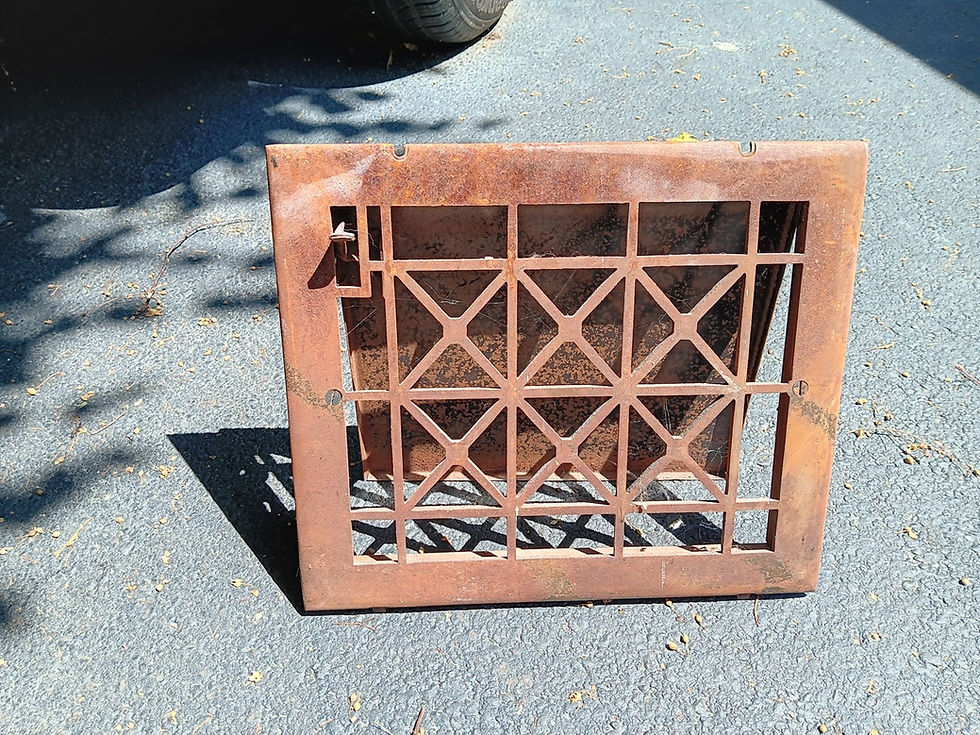
I’ve been helping my son with some work at a house purchased by his mother-in-law. The house has really cool features in it, including several ornate forced-air registers that direct furnace heat into the rooms. Today I worked on three of them, two from the living room and one from the dining room. Here is a picture of one. I can’t explain why it is so rusted:

In addition to being ugly, the open/close slide is frozen. I began by applying penetrating oil to the several screws that hold things together. After a few minutes and a bit of tapping to help get the oil into every crevice, the screws came right out. If you’re disassembling something like this, don’t skip the penetrating oil step. It makes things dramatically easier.

While the face plate may have originally been chromed (more on that later) it was obvious that the restoration would be de-rusting and painting.
To remove most of the rust, I used a small angle grinder with a very aggressive cup wire wheel attached to it. When using such a wheel, it’s critical that you wear eye protection, since pieces of wire routinely fling from the tool in every direction. It’s also best to somehow anchor the item so that both hands can be used to control the tool. Here is my angle grinder with the cup wheel attached. This cup wheel has steel wires, unlike my table-mounted (and less aggressive) brass wire wheel that I so love for cleaning and polishing things.

I used the grinder with the side/secondary handle attached, but took the picture before connecting it.
In about 15 minutes I had the front face cleaned down to bare metal. Having the right tool for the job made this pretty easy. There were spots that looked a little “coppery” which is why I think it may have been chromed at one time. (Chrome is usually a very thin layer over a base of steel, copper, and sometimes nickel.) I could not get into all the nooks and crannies, but overall the piece looked pretty good.

I repeated the process on the back section, and then used a medium/coarse emery cloth by hand to get into the corners and sections that couldn’t be reached with the power tool. Most of the back section will never be seen once mounted in the wall.

I wiggled the back section pieces slowly back and forth since the penetrating oil had freed up the adjusting mechanism somewhat. Once it began to move smoothly, I used pliers to make a few minor adjustments to things which were slightly bent out of correct position. I didn’t take pictures, but I also placed this piece so that the rivets on the slotted guide were against a piece of metal plate. I then hammered down the face of the rivets to tighten the wobbly guide against the back piece as it should be.

I then reassembled the front plate to the back section and sprayed them with a rust-controlling paint. While I don’t endorse any particular brand or product, I always show you what I use. I used the spray paint on the left in the photo below. I point that out because once again I tried to use the paint on the right (same company) without success. I’ve tried that “premium” version at least 4 times now, with the same result--poor spray pattern, splattering, and clogging of the nozzle. While the paint itself may be great, I have not had success getting a proper spray, and to boot, the nozzle doesn’t interchange with most other spray cans, leaving me essentially with full cans of paint that don’t spray. The can on the left worked flawlessly.

While I photographed the work on only one register, I repeated everything for the other two. Here they are in the bed of a pickup truck, soaking up the sunshine to help them dry more thoroughly:

I hope all your projects go well. Thanks for reading, and happy restoring!
Ed
If you’d like to download a PDF of this “Ideas” column, click here:


You can buy replacement nozzles for spray paint from Amazon.com, even specialty nozzles they use for high-end graffiti. Not horrendously expensive but you might be able to recover some of the cans on your shelf. Leaving cans of spray paint in a warm place for at least half an hour improves the odds of decent coverage and a good spray pattern.