Ideas from Ed: Pillar Party (Vol. 9, Issue 1)
- edwardpetrus

- Jan 1
- 3 min read
Sometimes I “read between the lines” to fully understand something. For example, I have a neighbor who often surprises me with a batch of my favorite no-bake chocolate/peanut butter/oatmeal cookies. Usually within a few days she has “some project” she’d like me to tackle. Today, a friend of my wife asked me “if I knew someone” who could make some replacement wooden pieces for the pillars on her front porch. Of course, she was secretly asking if I could make them. I was happy to help, and this project was very quick and easy.
Here is a picture of one of the three pillars on her porch. As you can see, the bottom surrounds are rotted, and several easily slipped out of their assigned positions.


Were I making the decision, I’d replace them all (12 pieces) and use pressure-treated lumber for longevity. She wants to paint them immediately and only wanted the four (two on each of two pillars) rotted pieces rebuilt, so she chose to use non-treated wood. (Remember, with treated wood, there is often a lot of shrinkage as it dries, and it should not be painted until thoroughly dry.) These pieces are basically a 2x4 with mitered ends, and a 1”x3” piece (also mitered) nailed atop it. The outer upper edges are rounded over.
I knew that it might be difficult to get precise measurements from the old and rotted wood, but I expected the miters to be good 45-degree ones. Wrong! I had to decide whether to try to make things “a bit off” like the originals or to make good miters. I elected to use proper miters, knowing that since things will be painted, adjustments can be made with sandpaper and caulk.
I selected a decent 2x4 and used my table saw to cut the end miters. I would normally use a miter saw for a project like this, but knew that I’d need my table saw anyway to rip the secondary piece to a 3” width. Pro tip: I flipped the 2x4 over for each 2nd cut, thus avoiding the need to move the miter gauge to the other side of the saw blade. I cut the pieces after simply tracing the best of the old ones, so no real measuring was needed.

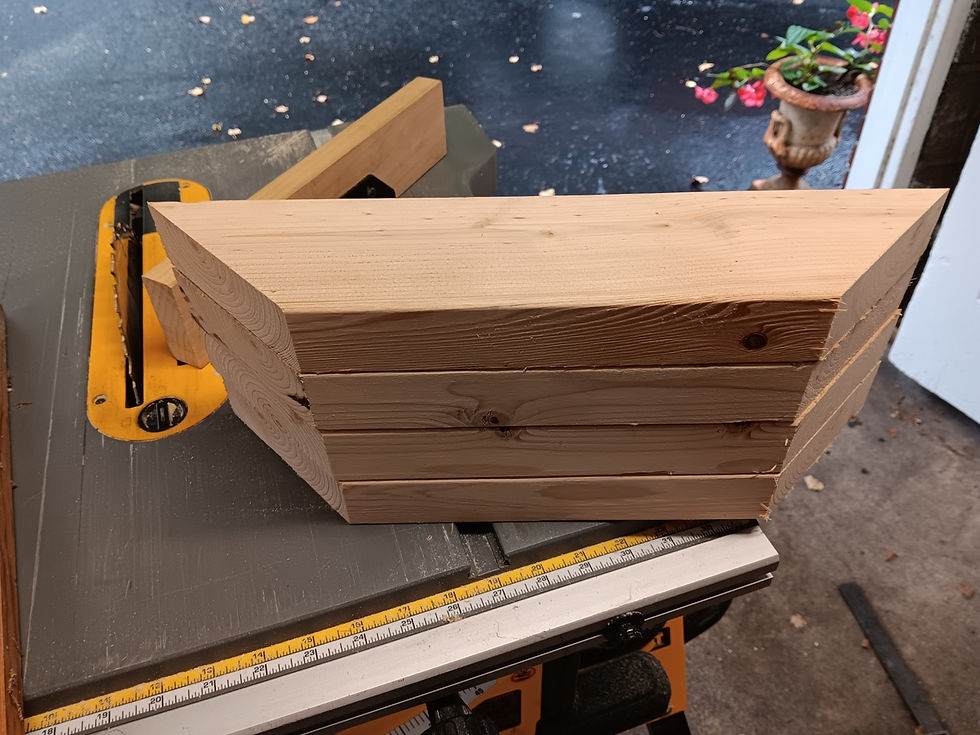
The upper pieces were cut the same way, but were ripped to width prior to cutting the mitered ends.


I used a rounding-over bit in my router to break the hard edges where needed.

Before attaching the tops to the bottoms, I applied a bead of weatherproof adhesive. I then nailed the pieces together using 2” galvanized finishing nails. I sunk each nailhead slightly into the upper piece using a punch. That will easily be covered with a dab of caulk prior to priming and painting.


Here’s a final picture of one of the new pieces alongside a rotted piece. This is how I presented the replacements to the homeowner. She will install them, making any final adjustments as needed prior to painting.

UPDATE: Only an hour after giving the pieces to the homeowner, she sent me the picture below after test-fitting one in place. As expected, a little sanding and some caulk will be needed. She is thrilled!

I hope all your projects go well. Thanks for reading, and happy restoring!
Ed
If you’d like to download a PDF of this “Ideas” column, click here:


Comments